ADB and micro USB for data communication

ADB stands for “Android Debug Bridge” and it basically just allows you to send commands to your device Ltouch.

Download SDK Platform Tools ADB is a small tool bundled in the Android SDK as part of the “Platform Tools.”

ADB stands for “Android Debug Bridge” and it basically just allows you to send commands to your device.

Users used to be required to download the entire SDK (which is very large) just to use ADB, but Google now allows users to download only the Platform Tools.

  • Download the SDK Platform Tools for Windows, Mac, or Linux from https://developer.android.com/studio/releases/platform-tools.html
  • Extract the ZIP file somewhere easily accessible (like C:\platform-tools) We’ve got ADB downloaded on your computer and your Android device is ready to receive instructions.
  • Now it’s time to put it all together and run your first ADB command.
  • Connect your Ltouch to the computer with a USB cable
  • The USB mode must be PTP in order for ADB to work. You can usually change this from the notification shade
  • Make sure to allow USB debugging if a pop-up appears
  • Open the platform-tools folder on your computer
  • Shift+Right Click and select Open command prompt here
  • Type adb devices and hit Enter

That’s all, good work

Websoket with server inside Android HMI Ltouch

In 2018 eight out of ten people have a smartphone, so it is a great achievement to share data acquired by our Android HMI Ltouch
(such as the measure of a temperature) over a wireless network and look at it with a web browser.

Let’s see how using an Ltouch 7, there are only 2 steps:

Step 1
Install an http server to provide the webpage with measures; in our tests we used Http Server by Tautvydas Andrikys, it is very interesting
because it can support php after the installation of Server for PHP by the same author. Once installed these apks, tap “server address and port” to set
an http port ,default is 8000, you can change but do not use privileged ports (ports below 1024 , see for example ), then choose ip address 0.0.0.0 to answer on each ip assigned to the Ltouch.

Enable php support:

CGI setting -> enable com.esminis.server.php (Server for PHP)

Finally enable start on boot.

Copy webpage index2.html to /mnt/sdcard/htdocs/public :
adb push index2.html /mnt/sdcard/htdocs/public
Copy configuration files for php server php.ini to /mnt/sdcard/www/config :
adb push index2.html /mnt/sdcard/www/config
Copy configuration files for http server: certificate.cert / certificate.key / httpd.conf to: /mnt/sdcard/htdocs/config
adb push certificate.cert /mnt/sdcard/htdocs/config
adb push certificate.key /mnt/sdcard/htdocs/config
adb push http.conf /mnt/sdcard/htdocs/config

Reboot touch.

However you can use any http server.
Enable hotspot in the settings of Ltouch: settings -> more -> portable hotspot , here we can setup wifi parameters : network name and
password, then tap on portable hotspot to enable it

Step 2
install the apk available in the download area; it’s a simple app which uses modbus library by Biemme to read the measure of a temperature
provided by an external device and connected to the rs485 port of the touch

Now using your pc or smartphone, you can connect to the wifi network just created: open a browser and type http://192.168.43.1:8000/index2.html
in the address bar, note that you must use the port set in the http server in the address, we are using 8000, if you set another value use that
instead of 8000.

Moreover, the duo webpage/application allow us to handle input/output pins handled by Android kernel on the side of Ltouch, the ones provided
by expansion boards are handled with modbus calls and are excluded.

Source codes are available in our download area

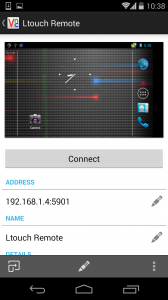
Come configurare l’Android Vnc Server

android vnc server from android clientIn questo post vi vorrei parlare della procedura di installazione e configurazione di un componente molto importante e utile: Android Vnc Server. Grazie a questa applicazione riuscirete a controllare da remoto un device Android. Questo tutorial è stato testato con i touch screen Ltouch, ma grazie a delle semplici modifiche è possibile estenderlo a quasi tutti i gli altri device Android.

Prerequisiti:
L’unico prerequisito è di avere un device rooted (i pannelli Ltouch lo sono già). Una conoscenza base del terminale di linux può aiutare a velocizzare la procedura di configurazione. Continue reading

Automazione Industriale con Android: Acquisizione di 6 sonde pt100

Il video che vi vogliamo presentare in questo post riguarda un esempio di Automazione Industriale con Android. In particolare, vi faremo vedere un progetto che abbiamo realizzato in cui un touch HMI AndroidLtouch F, equipaggiato di un microprocessore Cortex A8 a 1Ghz controlla un’espansione RS485 analogica, nello specifico ho usato un modulo espansione bm6PTI.

Dall’interfaccia touch screen Android è possibile:

Acquisire distintamente 6 sonde di temperatura mod. PT100 classe B attraverso un’ espansione in RS485 utilizzando una comunicazione modbus ad una velocità di 19200 bps

Volendo è possibile estendere l’applicazione aggiungendo altri moduli di espansione fino ad un totale di 250 bm6PTI con un’ acquisizione di 1500 sonde di temperatura.

Continue reading

Nuovo Pannello Touch Android con Wifi

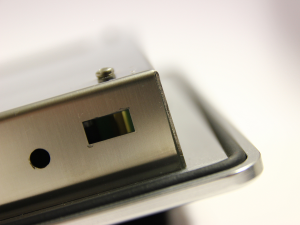
Android Touch Panel Rear CoverSiamo orgogliosi di annunciare che un nuovo prodotto è stato rilasciato nel nostro on line store. E’ un pannello touch Android per progetti HMI di automazione industriale e domotica.

Si caratterizza di un display multi touch capacitivo da 7″ con un processore SoC Samsung Cortex A8 ad 1Ghz, 512 MB DDR RAM dotato di molte interfaccie di comunicazione quali per esempio RS485, RS232, I2C, SD, Camera e molte altre.

La caratteristica addizionale che contraddistingue questo pannello touch è il pieno supporto a Ethernet come anche a reti WAN 802.11 b/g/n.

Il prodotto è disponibile in due versioni:

  • Ltouch FW ha una cornice frontale in alluminio anodizzato e brillantato di spessore 5mm e cover di protezione posteriore. Grazie a questi layer di protezione e ad un particolare processo di assemblaggio, il prodotto raggiunge un livello di protezione IP54 nella parte frontale (acqua e polvere).
  • Ltouch SW è una scheda di sviluppo che ha le stesse caratteristiche del pannello touch Ltouch FW ma non ha la cornice frontale e la cover di protezione posteriore. In questo caso, questo prodotto è utile nel caso di installazione in strutture già preesistenti.

Come Montare Flash Memory aggiuntive in Android

In tutti i pannelli Ltouch, non appena una pen drive viene collegata ad uno dei quattro connettori USB disponibili, il sistema Android la carichera’ automaticamente (monta in gergo tecnico) in /mnt/usb e si potra’ verficiare l’effettivo caricamento andando su System Preferences/Storage.

Cio’ succede solamente per la prima flash memory USB connessa. Se avete la necessita’ di utilizzare più pen drive, allora è necessario installarle manualmente ed istruire Android in modo tale che riesca a gestirle correttamente. Questo è il tema principale dell’articolo. Continue reading