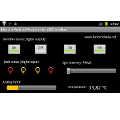
The project I’m working on is about making an industrial automation system using an ARM Cortex A8 1Ghz Android-based touch HMI and a slave bm6PTI expansion module that communicates using RS485 and Modbus.
From the Android touch screen is possible to directly read 6 class B PT100 Temperature probes through an expansion module using RS485 and Modbus protocol at a speed of 19200 bps.
If required, it is possible to extend the project by adding other expansions modules up to a total of 63 bm6PTI therefore 378 temperature probes can be read.
- Eclipse IDE,
- Eclipse ADT plugin,
- Android SDK
Basically, the Android project is formed by the following files:
- on the /src folder, the main Activity and the Java class that defines the modbus signatures for the external modbus library
- on libs/armeabi folder, the modbus library
- on res/layout, the layout of the main activity
- on res/values folder, string.xml file
- on the main folder, the AndroidManifest.xml
The ModbusLib class simply declares the signatures of the modbus library functions that will be used in the Android project.
package com.biemme.modbus;
public class ModbusLib {
public native static int openCom(int baudrate, long rtimeout, long wtimeout);
public native static long ReadHoldingRegisters(int fd, int id, int address, int no_of_registers,int []holdingRegs);
public native static int closeCom(int fd);
static{
 System.loadLibrary("com_biemme_modbus_ModbusLib");
 }
}
It’s now time to analyze the java code that manages the main activity (called MainActivity.java). As a matter of clarity, I’ll comment out each key part of the class separately.
public class MainActivity extends Activity implements OnClickListener {
The first method that is triggered (by an intent) when the windows is open is the OnCreate. It simply set the content view (i.e., it explicitly connects the view to the controller) and links the graphical elements like text, image view to the referring class’ private attributes (in such a way they can be referenced back later on in the class).
 protected void onCreate(Bundle savedInstanceState) {

requestWindowFeature(Window.FEATURE_NO_TITLE);
 super.onCreate(savedInstanceState);
 setContentView(R.layout.activity_main);

temperature1= (TextView) findViewById(R.id.texTemp1);
 temperature2= (TextView) findViewById(R.id.textTemp2);
 temperature3= (TextView) findViewById(R.id.textTemp3);
 temperature4= (TextView) findViewById(R.id.TextTemp4);
 temperature5= (TextView) findViewById(R.id.TextTemp5);
 temperature6= (TextView) findViewById(R.id.TextTemp6);

}
The following onResume method will be executed when the activity first starts (but after the onCreate) or after it is paused. It contains the methods that open the device’s serial port and stores the file id into a private variable.
 protected void onResume() {
 super.onResume();
 if (fid == 0){
 fid = ModbusLib.openCom();
 Log.d("uart=",String.valueOf(fid));
 }
 cancelReadThread();
 workingthread=new ReadsWrites();
 workingthread.start();
 }
In the next post we explain how, in a simple command line, you can save the read temperature value in a SD so as to create a data logger.

