 In this post I would like to show you the steps required to set up an Android Vnc Server to remotely control Android devices. This walkthrough has been tested with the Ltouch Android panels, but with simple modifications this tutorial can be used with any other Android devices.
Prerequisites:
The only requirement for this would be to have a rooted device (the Ltouch is already rooted). A basic knowledge of linux terminal commands could speed up the setup process.
Before delving into the details of the tutorial, we describe the main tool needed to achieve the goal. First, you need an Android Vnc Server daemon that runs on the remote device and that manages all the incoming requests. There exist many Android Vnc Server apps on Google Play (thanks Jaime) such as:
Their rates are not very good and this is an evidence that a proper set up must be provided. We found a good set of parameters for the Vnc Server app.
The steps needed are the following:
1. Download and install the Android Vnc Server app.
2. The app’s files are located on the folder:
/data/data/com.schumi.vncs/filesYou can for instance start the Android Vnc Server app by typing the command from within the folder:
./android_vncs -p 123456 -r 0 -s 100 -P 5901 -i enablewhere as -p 123456 parameter specifies the password (requested once the clients connect) and -P 5901 specifies the port to connect to.
This command enables any vnc clients that know the password to remotely connect to the Android device. Note that this is a read-only connection because no parameters have been provided for the mouse and touch resources (more info on that in a moment).Depending on the Android version and on the remote device used, the input and touch resources might be mapped on different /dev file resources. In order to identify the right /dev resources to use, just play with it a little bit and verify which one that work best for you. The input resources might be under /dev/input and display under /dev/graphics.
For the Ltouch, the command with touch and display parameters is:
./android_vncs -t /dev/input/event2 -r 0 -s 100 -P 5901 -i enable -m fb -f /dev/graphics/fb03. The final step is to start the Android Vnc Server when the device boots.
Even in this case a unique solution does not exist. For the Ltouch panel you can for instance place the command in a script that will be executed when the system starts, like for instance in the install-recovery.sh file. The file must be placed in the /system/etc folder and the latter must be mounted with read/write permissions:adb remount adb shell cd /system/etcNow the file can be created and modified by using the vi command (this command is bundled with the busybox utilities, that’s why vi can not be launched directly from the command line):
busybox vi install-recovery.shNow add the following commands in the file:
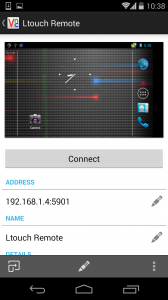
#!/system/bin/sh /data/data/com.schumi.vncs/files/android_vncs -t /dev/input/event2 -r 0 -s 100 -P 5901 -i enable -m fb -f /dev/graphics/fb0Save, close and change the file permission to 755. Reboot the system. Now, you will be able to connect to the device using a Vnc Client. Required are the device’s IP address, the port (5901 for this tutorial) and the password.
That’s it. If you liked this article, please share it.
As usual, comments and share are welcome! 🙂
