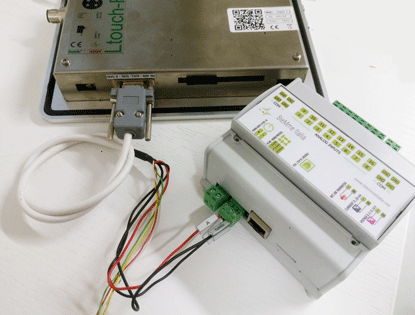
Performance tests in case of rs485 failure

In my home automation project with Arduino and Android I always paid special attention to communication failures. These might happens for many reasons and the system has to deal with them.

In particular, in the following video I was interested to show you some test I made in order to assess whether the information presented by the touchscreen panel will be displayed whenever available.

The red led indicates that the Arduino is processing a modbus request. As you can see, it stops blinking when the bus 485 is interrupted and immediately after the connection has been restored, it restart to work. Indeed, take look at the bulb icons in the monitor. When the bus is restored, the bulb status will be updated.

The description of the project and the source code are also available. Take a look!

As usual, comments are well appreciated! 🙂

New Arm Cortex A8 MCU touch screen

Arm powered logoIn this post, I’d like to share with you a video preview of the latest development board (Single Board Computer) with Android OS that I’m working on. It has a capacitive 7″ touch screen. Compared to the MCU ARM used in a previous home automation project, this SBC is shipped with an ARM Cortex A8 MCU at 1 GHz and with no doubt it is very powerful and fast.

In addition to Android (up to ver 4), it supports WinCE and Ubuntu. It has 512MB DDR2 on board SDRAM, 4GB of iNand flash memory, Ethernet, serial ports (3x Rs232, Rs485, uart, i2c, spi) and 4x USB Hosts, HDMI and TV OUT, 2x SD, G-sensor, GPS and GPRS interfaces and many more. For those of you interested to use this ARM Cortex in industrial automation, I designed a native Android library that manage the rs485 modbus protocol.

Take a look at the complete technical specifications. I’m working to share the Android projects I used for smart homes and industrial automation. If you find it interesting and you think that it could be a valid solution to your needs, please consider to buy it 🙂

As usual, comments are welcome!

Android App and Modbus RTU

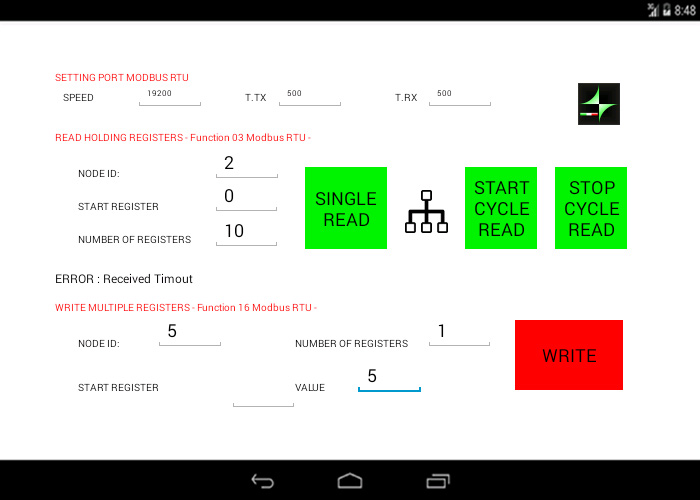
We made a small and simple application for our well Ltouch panels to allow users to configure and subsequently communicate with all Modbus RTU devices.

Biemme Config, will be installed as standard on all our touch, so make it easier to configure the Modbus RTU devices.

In a few simple steps we can write and read using the Modbus RTU functions 03 and 16.

We prepare communication; We connect via a three-wire cable on Modbus device and Ltouch.

The Modbus RS485 port is positioned in the side of a connector DB9 and uses these pins:

  • 2 – A
  • 3 – B
  • 5 – GND

Set the speed of communications (thanks to our Libreria the app supports speeds up to 115200) and the timeout.

The Function 03:

Node Id: corresponds to the slave to read.

Start Register : corresponds to the first register for the Modbus read

Number Registers: Corresponds how many registers I want to read

Once configured these three fields we can, using the three buttons, perform the read request.

Single reading: Ltouch will perform a read-only and represents the values read on the screen.

Continuous cycle reading: Ltouch will perform the readings at intervals of a second in a cyclic mode. The values will be shown on screen.

FUNCTION 16:

With this feature we can write the integer values:

Node ID: It corresponds to the address of the slave in which I am going to write

Start Register: It is the first register in which I am going to write

Number Registers: It represents the number of consecutive registers in which I will write the value.

Value: It represents the value that will write.

To close the application just press over the Biemme logo

Android Arduino Communication through Modbus and Rs485

In this post I’d like to describe you a project I’m working on that consists of connecting an Android multi touch panel to one (or more) Arduino slave(s) using modbus protocol and RS485.
Even though the idea of this project could be applied in many fields, I chose to contextualize it in a typical smart home context: a touch display that dims lights, shows temperatures and bulbs statuses.


The nice feature of the Android multi touch panel I used is that it has many interfaces such as Ethernet, RS485, RS32 and I²C as well.
I expressly selected RS485 because Arduino-based microcontrollers are not ready for Ethernet yet (even though some examples still exist but without great success). Indeed, RS485 is a well known standard that has been widely used in the indus­trial con­text and in building automa­tion appli­ca­tions. It is a half-duplex, 2-wires, low noise bus that allows high speeds and remote devices connection (up to 1200 meters).
Furthermore, modbus is a serial communication protocol, developed for industrial applications, open and easy to deploy and maintain. I used modbus RTU, but other variations of the protocol still exist though. Continue reading

Using Bundle Android to Exchange Data between Threads

The question that I want to answer with this post is the following: How bundle Android works for exchanging data from a running thread to the main UI?

This is a fairly common situation in Android projects and very simple to figure it out. The context might be the following:

  1. An Android activity that creates a thread running some work
  2. The created thread has to exchange some data with the main UI thread

This situation can be handled by using a combination of Android bundles and messages. Continue reading

How to configure an Android Vnc Server

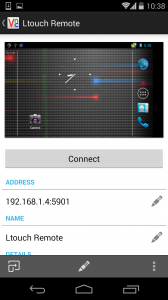
android vnc server from android clientIn this post I would like to show you the steps required to set up an Android Vnc Server to remotely control Android devices. This walkthrough has been tested with the Ltouch Android panels, but with simple modifications this tutorial can be used with any other Android devices.

Prerequisites:
The only requirement for this would be to have a rooted device (the Ltouch is already rooted). A basic knowledge of linux terminal commands could speed up the setup process. Continue reading

The Pltouch I/O Library as the PLC: An Example

In one of the first blog posts of the Pltouch series, we anticipated that the I/O library can be used in a way the PLC developers are familiar with (but it is not the only way of course).

PLC developers are accustomed to have a big infinite loop in which the code is executed sequentially. Conversely, in PC programs and in apps as well, this is not the case, there is no infinite loop and in mobile apps there are even many entry points. 

Based on those assumptions, the learning curve of PLC developers that want to embrace the Android/Java world might be steep. In order to smooth the steepness of this learning curve, the Pltouch I/O library allows users to continue to use the PLC-style  way of doing things even in the context of Android apps. 

Continue reading

La libreria Pltouch I/O come il PLC: Un esempio pratico

In uno dei primi articoli della serie sul Pltouch, abbiamo discusso di come la libreria I/O per il Pltouch venga in contro ai tanti sviluppatori che sono abituati alla programmazione per PLC.

Coloro che sviluppano software per PLC sfruttano il paradigma di programmazione per cui tutto il codice viene eseguito in maniera sequenziale all’interno di un while(true) infinito. Purtroppo questa apparente semplificazione rende piuttosto ripida la curva di apprendimento di linguaggi con paradigma di esecuzione diversi (quali per esempio Java).

La libreria I/O Pltouch cerca invece di rendere questa curva piĂą liscia possibile proponendo un approccio che permette di utilizzare anche in ambito Android lo stile di programmazione PLC.

Continue reading

How to set the Android network interface using shell commands

android network configurationIn this post, I’d like to tell you how to set the Android network preferences on Android devices, that is, IP Address, Netmask, Gateway and DNS. This process can be easily done using the Android GUI, specifically in the Settings/Ethernet menu configuration. However, sometimes it is useful to know the shell commands in order to add them in boot scripts. The commands that you’ll find below, has been tested with the Android Ltouch7 multi-touch, but I’m confident that there settings should work also with other devices too.

Continue reading

Android IO library for the BieMme Pltouch

In a previous article we introduced the Pltouch, a brand new Android-based HMI with an additional set of I/O pins addressable directly from the Java source code. 

In this post, we would like to explain the rationale behind the Android IO library that is provided free of charge in every Pltouch. This Android Java library acts as a bridge between the Android world and the low level I/O pins.

Once the library has been imported in an Eclipse workspace there are two ways in order to structure your app’s code. In both cases you have to

  • Create an instance of the Android IO library
  • Store this reference in the activity class (like for instance using private/public class field)
  • Call the initialization method

Let’s go through every point and expand each one with examples.

Continue reading