How to use Relay on Ltouch43

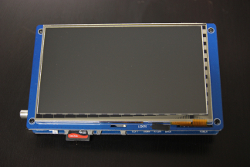
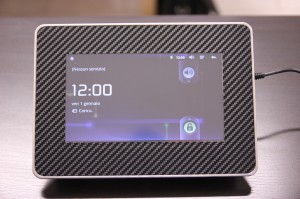
In our Ltouch43 Android HMI  there are 4 Relays and all the relays are in exchange contact. They have 24Vdc coil and max 5A contact current. All RELAY outputs are high quality relay and protected by varistors, all connectors are removable.
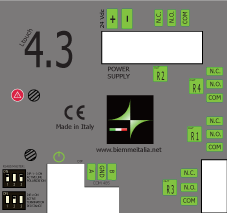
BMTouchGP12 – Relay R2

BMTouchGP13 – Relay R4

BMTouchGP14 – Relay R1

BMTouchGP15 – Relay R3

Before using them we must in the onCreate method :

instantiate the library BMtouch::

  • tmp = BMTouch.LIBsetup(BMTouch.EN12 + BMTouch.EN13 + BMTouch.EN14 + BMTouch.EN15);

Set PIN (GP–) as output, sets the pin (pin) indicated as output and sets its logical level as value::

    • val[0]= 0;
    • BMTouch.GPIOSetupOut(BMTouch.GP12, val[0]);
    • BMTouch.GPIOSetupOut(BMTouch.GP13, val[0]);
    • BMTouch.GPIOSetupOut(BMTouch.GP14, val[0]);
    • BMTouch.GPIOSetupOut(BMTouch.GP15, val[0]);

To switch the output by activating it or not, use this command::

    • tmp=BMTouch.GPIOWrite(BMTouch.GP13, val[0]);

where val [0] corresponds to:

  • 0 relay OFF
  • 1 relay ON

New Arm Cortex A8 MCU touch screen

Arm powered logoIn this post, I’d like to share with you a video preview of the latest development board (Single Board Computer) with Android OS that I’m working on. It has a capacitive 7″ touch screen. Compared to the MCU ARM used in a previous home automation project, this SBC is shipped with an ARM Cortex A8 MCU at 1 GHz and with no doubt it is very powerful and fast.
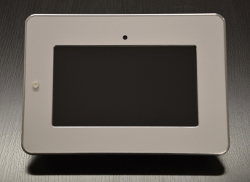

In addition to Android (up to ver 4), it supports WinCE and Ubuntu. It has 512MB DDR2 on board SDRAM, 4GB of iNand flash memory, Ethernet, serial ports (3x Rs232, Rs485, uart, i2c, spi) and 4x USB Hosts, HDMI and TV OUT, 2x SD, G-sensor, GPS and GPRS interfaces and many more. For those of you interested to use this ARM Cortex in industrial automation, I designed a native Android library that manage the rs485 modbus protocol.

Take a look at the complete technical specifications. I’m working to share the Android projects I used for smart homes and industrial automation. If you find it interesting and you think that it could be a valid solution to your needs, please consider to buy it 🙂

As usual, comments are welcome!

Android Arduino Communication through Modbus and Rs485

In this post I’d like to describe you a project I’m working on that consists of connecting an Android multi touch panel to one (or more) Arduino slave(s) using modbus protocol and RS485.
Even though the idea of this project could be applied in many fields, I chose to contextualize it in a typical smart home context: a touch display that dims lights, shows temperatures and bulbs statuses.


The nice feature of the Android multi touch panel I used is that it has many interfaces such as Ethernet, RS485, RS32 and I²C as well.
I expressly selected RS485 because Arduino-based microcontrollers are not ready for Ethernet yet (even though some examples still exist but without great success). Indeed, RS485 is a well known standard that has been widely used in the indus­trial con­text and in building automa­tion appli­ca­tions. It is a half-duplex, 2-wires, low noise bus that allows high speeds and remote devices connection (up to 1200 meters).
Furthermore, modbus is a serial communication protocol, developed for industrial applications, open and easy to deploy and maintain. I used modbus RTU, but other variations of the protocol still exist though. Continue reading

Android Industrial: AC Drive over rs485

The following video represents an example of HMI in Industrial applications. In particular, in this project I used an Android multi touch that runs on Cortex A8 at 1Ghz and show how it can greatly control an AC drive. Specifically, I used a Allen-Bradley adjustable frequency AC drive.

The Android UI on the touch screen device allows to:

  • Start/Stop the motor
  • Set the direction (forward, backward)
  • Manage the output relay
  • Control the status of the digital inputs
  • See the parameters such as the current, frequency and output voltage
  • Set the motor frequency

You’ll find the source code and complete specifications of the project on my github channel. Don’t miss to check it out also our wiki section! As usual, comments are welcome 🙂

Biemme Store Opening

We are happy to announce that our new on line store is now open. The key product we want to present is our new development board. Take a look at it, we hope you will find useful for your needs.

To date, we were concentrated to provide the customers two development boards with capacitive touch screens that can be used in many contexts like industrial and home automation systems. The availability of many interfaces (like Ethernet, rs485 etc) and the possibility to install Android, Linux and WinCE 6.0, make the boards very flexible.

For professional users that would like to to integrate our board into their existing industrial instruments, we designed a free native Android library that supports the modbus RTU protocol through rs485. In this way, you only need to create an Android project, link the modbus library and call the methods provided.

Development board in stock:

The first board includes an aluminum frame 5mm thick and a rearward steel protection cover. The frontal frame has a button to power on/off the system and to set and wake up from standby. The frame could be white or black.

Ltouch with white frame development board
The second board does not include the frontal frame and rearward protection as the picture on the right shows, in order to allow the customer to place it inside an already existing structure.
The board works also with Arduino slaves, take a look at these nice demo video on youtube.

Ltouch without frame development board

Android touch

Ltouch touch screen boardWe designed and developed a control system that uses our new board with Android operating system and a 7″ capacitive touch screen (figure on the right). It is connected to a pool of Arduino’s slaves over rs485 channel. Our tests suggest that the most efficient and lightweight communication protocol is the modbus. It works greatly also on Arduino devices. Indeed, we used Maxim’s max485 chip in order to convert Arduino TTL serial signal to rs485. Terminator resistor (120 Ohm) is connected accross the two wires to limit data corruption. Continue reading